Bastian Maestro Export Adapter SignalR
Overview
The SignalR flavor of Bastian Maestro Export Adapter is capable of using SignalR to push notifications to clients. Under the hood SignalR is just a message spec on top of HTTP & WebSockets, as well as a suite of class libraries (in many languages) to simplify communicating over the spec.
It is possible to use API testing tools like Postman or Insomnia to connect a raw WebSocket to a SignalR server and start sending / receiving messages. The following examples and images demonstrate that process. See this related blog post on Medium for more information.
Within this repo is a primitive Reference SignalR server. When deployed, the reference server is not actually hooked up to a real Maestro instance, but it can still be used to send mock notifications to clients.
Negotiation
The ideal way to connect to a SignalR server over WebSocket is to first negotiate over HTTP. See the SignalR Spec for more information about the options for the negotiation process. It is possible, but not recommended, to skip the negotiation process.
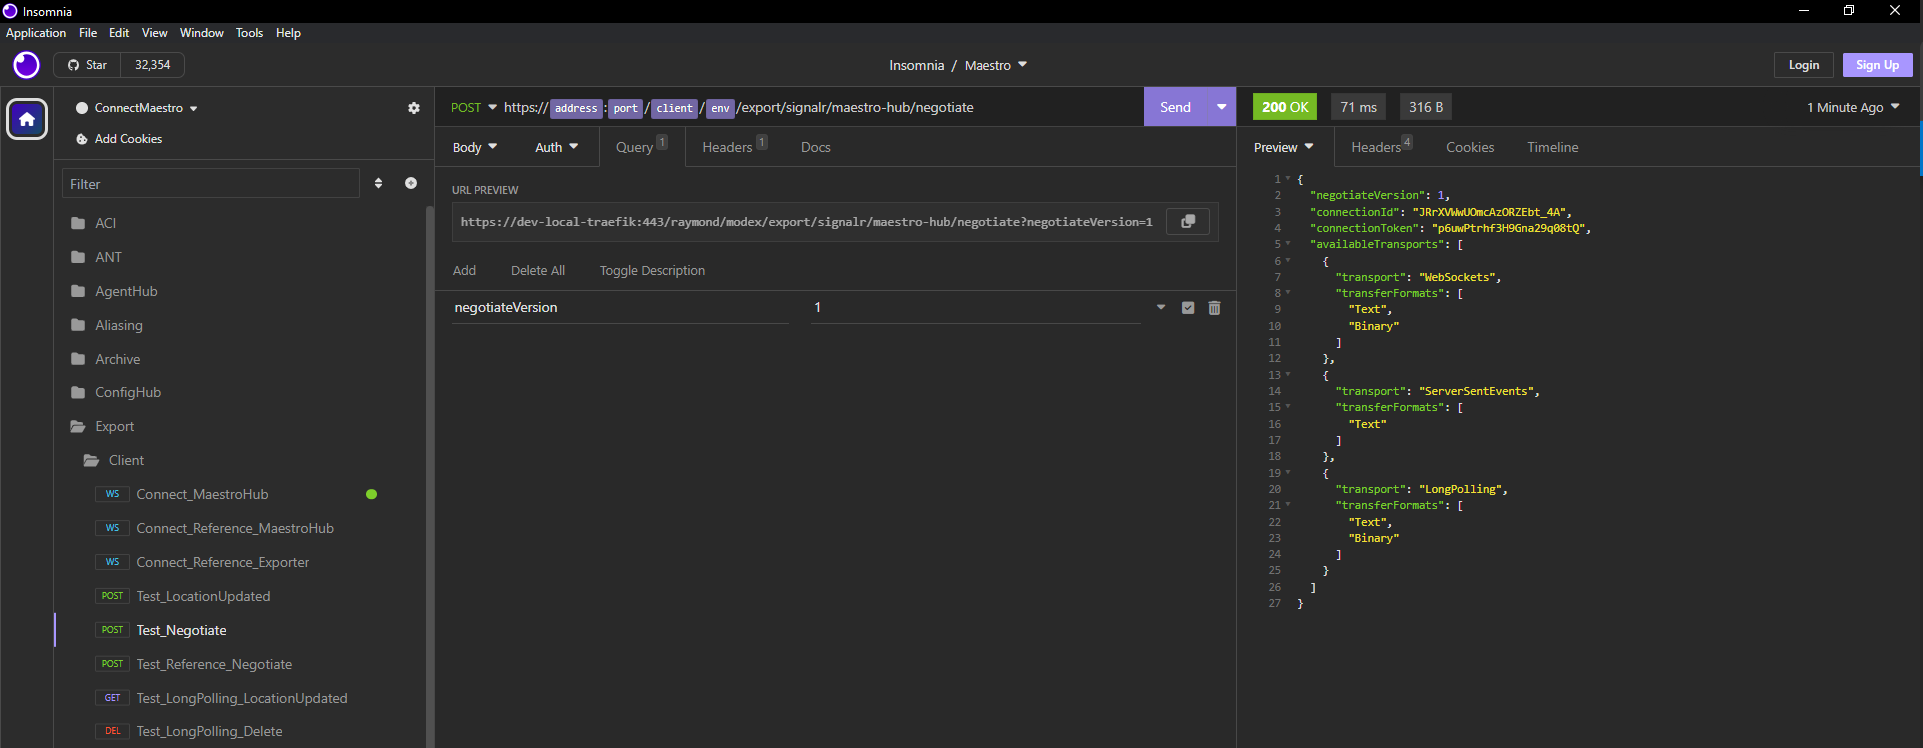
The Maestro recommended method for negotiation is version 1, where the client sends an HTTP POST request to an endpoint like /maestro-hub/negotiate with the query param negotiateVersion set to the value 1. Importantly, with version 1 of negotiation, the returned connectionToken is the value that must be passed as the id in all future requests.
The following screenshot from Insomnia shows a POST request to https://{{address}}:{{port}}/{{client}}/{{env}}/export/signalr/maestro-hub/negotiate?negotiateVersion=1 and the associated response body.
Connecting over WebSocket
From an API testing tool like Postman or Insomnia, it is possible to connect to a SignalR server over WebSocket, send the initial message, and then start receiving the notifications & pings. It is even possible to send messages back up to the server.
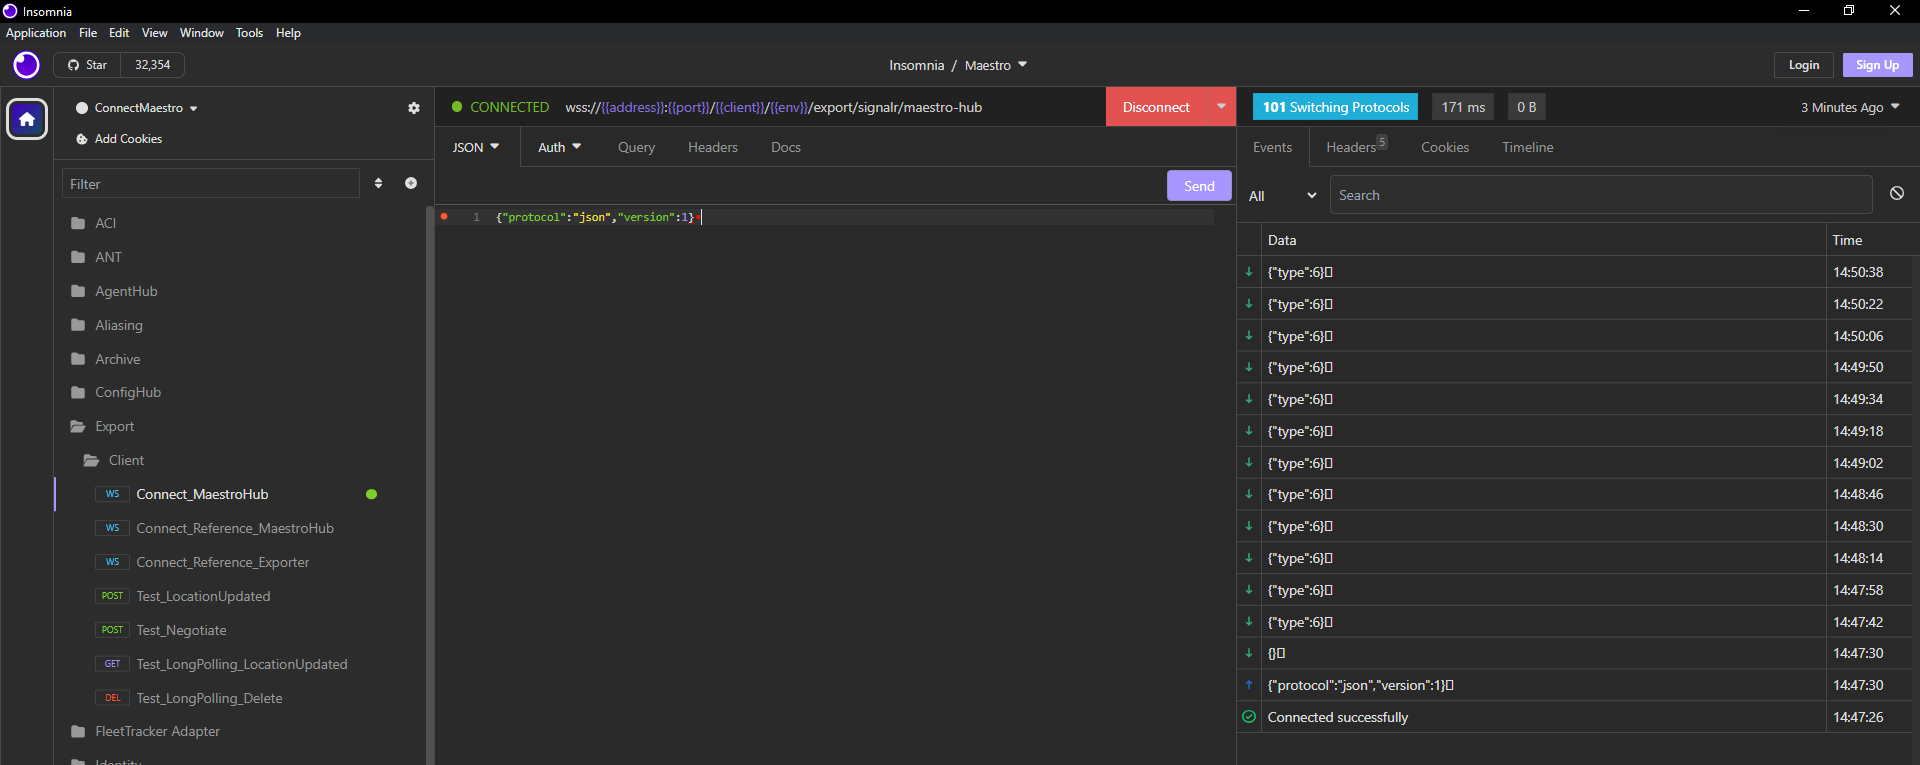
The most important part of initializing the WebSocket communication is to send the following json payload, from the client to the server, after the WebSocket connection has been established. The tricky part is sending the end terminator, which is the special character 0x1E/U+001. The following snippet should contain the correct end terminator, as required by Postman or Insomnia.
{"protocol":"json","version":1}
After connecting the WebSocket and sending that initial payload, the socket should start receiving pings and notifications. It is even be possible to send messages from the client to the server, though currently the server does not handle any messages.
Notification API
The Bastian Meastro Export Adapter Notification API Spec details the basic notifications which can be published over SignalR. Note that, in typical SignalR fashion, all json payloads will be delimited by the special end terminator.
Agent Updated
The AgentUpdated SignalR target will contain the following ordered arguments. See the full notification API spec for more details about the individual properties.
Agent Updated Arguments
| Index | Name |
|---|---|
| 0 | AgentId |
| 1 | AgentTypeId |
| 2 | MaestroStatus |
| 3 | MaestroStatusReason |
| 4 | Timestamp |
Example AgentUpdated Notification:
{"type":1,"target":"AgentUpdated","arguments":["Agent1","AgentType1","\"IDLE\"","Vehicle is chillin","3/8/2024 7:16:00 PM"]}
Task Updated
The TaskUpdated SignalR target will contain the following ordered arguments. See the full notification API spec for more details about the individual properties.
Task Updated Arguments
| Index | Name | |
|---|---|---|
| 0 | TaskName | |
| 1 | TaskGroupName | |
| 2 | TaskType | |
| 3 | TaskAssignmentStatus | |
| 4 | TaskExecutionStatus | |
| 5 | AgentId | |
| 6 | AgentTypeId | |
| 7 | MissionName | mission |
| 8 | OnHold | |
| 9 | TaskDuration | |
| 10 | Timestamp | |
| 11 | UserId | |
| 12 | Reason |
Example TaskUpdated Notification:
{"type":1,"target":"TaskUpdated","arguments":["Task 1","ExampleTaskGroup","ExampleTaskType","Assigned","Eligible","ExampleAgent","ExampleAgentType","",false,0,"2/28/2024 4:35:06 PM","TestUserId","TestReason"]}
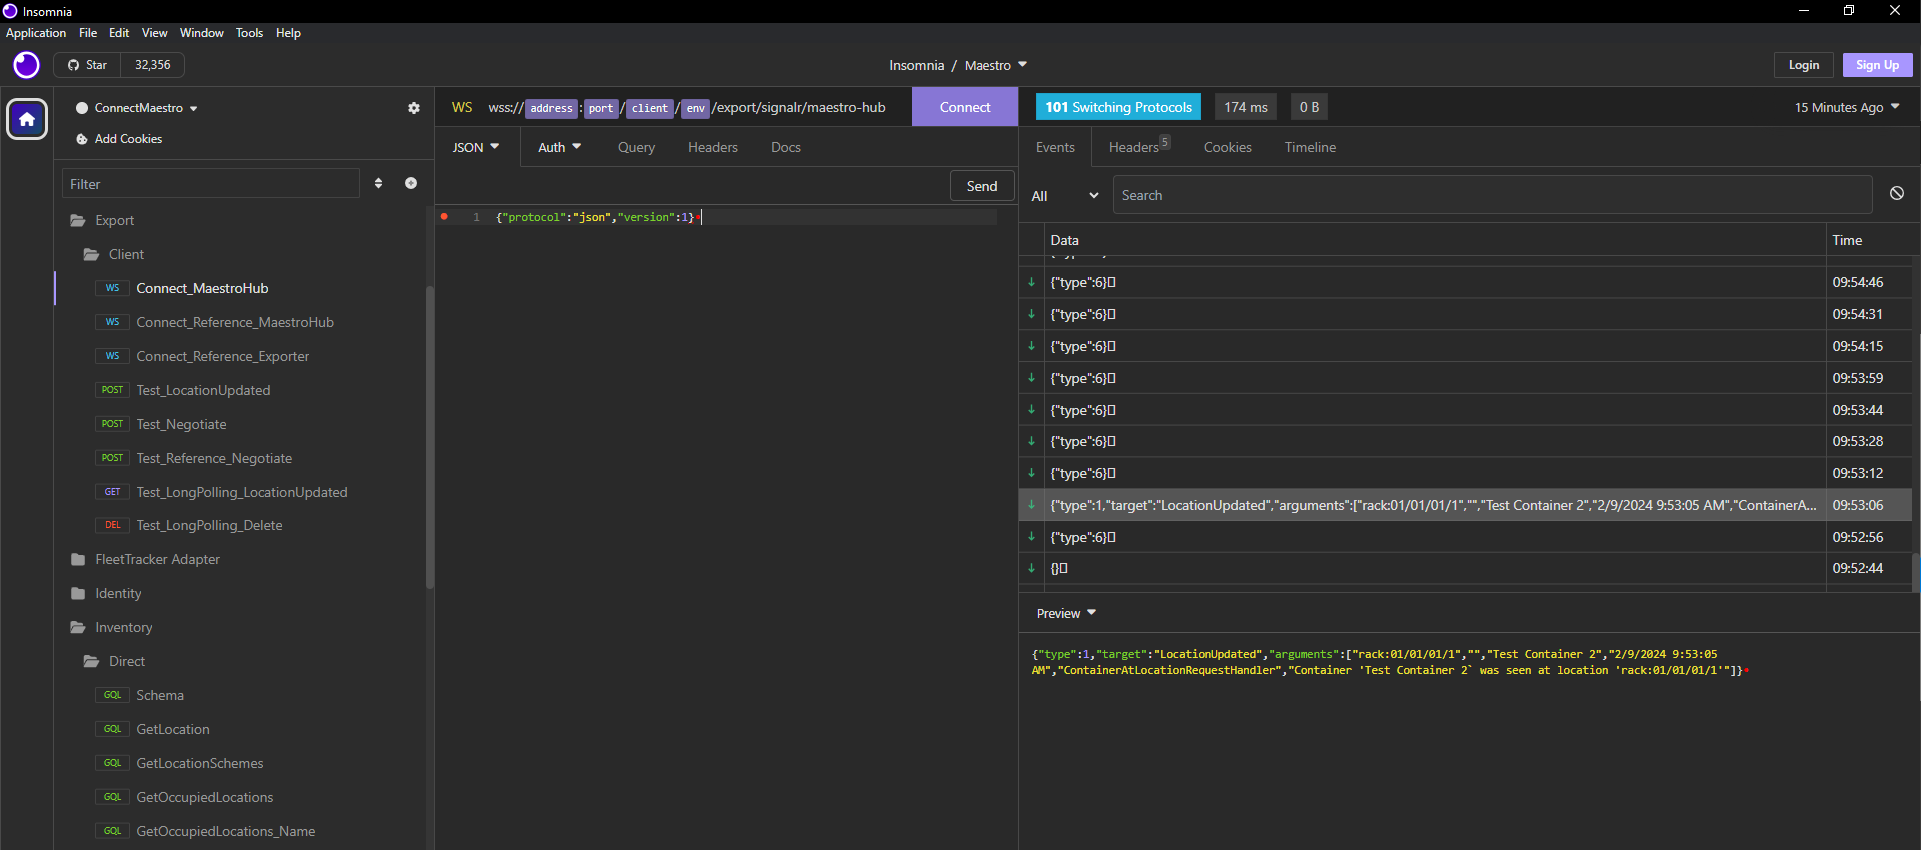
Location Updated
The LocationUpdated SignalR target will contain the following ordered arguments. See the full notification API spec for more details about the individual properties.
| Index | Name |
|---|---|
| 0 | LocationId |
| 1 | OldContainerId |
| 2 | NewContainerId |
| 3 | Timestamp |
| 4 | UserId |
| 5 | Reason |
Example LocationUpdated Notification:
{"type":1,"target":"LocationUpdated","arguments":["rack:01/01/01/1","","Test Container 1","2/9/2024 9:53:05 AM","ContainerAtLocationRequestHandler","Container 'Test Container 1` was seen at location 'rack:01/01/01/1'"]}